Showing posts with label Desserts. Show all posts

Thursday, February 18, 2010

Thoughts and Pie


Hey everyone, long time no see! I’m sorry I left without a “back in 5” sign on the door. School has started again and I guess it’s been a little more demanding than I expected.


Although I haven’t been posting, it’s given me a little time to think over the philosophy of my blog. When I started posting, which I know wasn’t that long ago, I had a plan to share veggie food that came across my path and post it at least once a week. Somehow, it turned from a general food search to a recipe search type deal. (Maybe it’s because I haven’t really had the chance to go out for food all that much lately.) I guess I just wanted to let you know that although I will still be posting recipes, you can also expect to see some other veggie-related posts once in a while.


Also, I’ve decided to follow a policy of quality not quantity. I quite enjoy posting and doing so every week. However, I’ve found with my time constraints, that it becomes quite rushed, and overall not as fun to do…… so I’m not gonna.


Okay, back to business.


Everyone: I just got the best book in the world! Okay, well not really. But I’m super excited about it! It’s called Professional Chef and it’s a textbook put out by the CIA (link). It’s a little intimidating (like over 1000 pages), but I can’t wait to go through it! I’ve been cooking regularly over the past 3 years, so I’m still pretty new at the game. I can cook some pretty decent meals nowadays, but I find that I’m not quite up there when it comes to technique (I have no idea what I’m doing). I’ve always wanted to be able to cook sans recipe, and I think this book may help! Even though it does contain recipes (like 600 of ‘em), it also goes through various techniques, their purpose and what they hope to achieve. Eg. some topics include the different characteristics of regional cuisine, how to develop different flavours of tomato sauce, soup formulas, etc. The only thing about this book, which I wouldn’t necessarily say is a bad thing, is that I think I’m going to have to invest in a half-decent kitchen scale. The one I have (from Save-On) just isn’t going to cut it.


Anyway, if you’re looking for something more encyclopedic when it comes to cooking, this book may be worth considering. I also give it a pretty decent “veggie-friendly” rating because although it includes a topic on meat and many meat-filled recipes, this isn’t the sole focus on the book. Also, with this topic included, I hope to understand the flavouring process that goes into some meat dishes and translate it to a veggie alternative. (Wish me luck!)

Now, if you’re wondering why there’s a picture of a pie at the top of the page, no, the “A” doesn’t stand for Alberta Bean. It was actually a belated birthday present for my cousin (whose name also happens to begin with “A”). I’m actually quite proud of this pie, as it is the first pie I’ve ever made, and I DID IT FROM SCRATCH! (with the help of Professional Chef)


The pie crust was made with the help of the proportion guidance of my textbook and the filling recipe I found online. Let me know what you think!


-A


P.S. I also made baby pie. Cute, no?


Wednesday, December 23, 2009

Cake "Napoleon"

Okay. First order of business. Verdict on Banan’ bread. Excellent. I’m a fan of all types of banana bread – spicy and sweet. The last recipe was a sweet one, but the coffee just gives it the right amount of bitterness. I’ve made this recipe once more since and I was right, the recipe calls to make two mini loaves, so if you’re making a single one like I did, just lower the oven to 300F and I baked for at least an hour and fifteen (but I think this will also depend on your oven, so just make sure you toothpick test the dough!)

Next. HAPPY HOLIDAYS EVERYONE!! ‘Tis the season for shopping and parties and has it ever been busy! Whew! I’ve spent the last 2 days baking up a storm of cookies and cakes! They won’t all make it to blog but I do have a special treat for you!


My friend Cassie also got me one of the best kitchen-related presents ever!! Some cute new cookie cutters and THIS:


Isn’t it adorable?? I wish I had all these retro patterns. So stylish and cute! P.S. Notice the cupcake??


With all the baking I was able to put it to good use right away!


So I want to share with you a childhood treat of mine. When I was young, my parents had a friend named “Krystina” (say this with a Russian accent). She was a grandiose lady (think Alice in Wonderland’s Queen of Hearts) and was always throwing parties. I loved those parties for one reason I remember more than any other. The cake. Oh! It was so delicious! She called it Napleon Cake and she would never share the recipe. It was filled with cream and lots of tiny layers (I recently found out it also goes by another name in French “Mille-Feuille”). If you have never tried it I can’t recommend it more, but if you’re going to make it,WARNING, it’s NOT easy.


I recently found a website called RussianFoods.com that actually carried the RECIPE for this tasty treat. However, I found myself lost in a few places (due to a few errors in the recipe I think). I was really worried a few times during this caking process, but somehow, it turned out pretty similar to what I remember, so you can imagine how pleased I am!


I baked this cake for my lovely friend Nina (Happy Birthday Nina!!)


And thanks again to Tim for opening his home for her birthday and putting up with a female Rockband takeover (but he still rules way more at the “instruments”).


Okay, are you ready?


Here it goes.


Cake “Napoleon”


(look at all the tiny layers!!)


Here is the original recipe, but I will also explain my "enhancements"


Ingredients

Dough

· 500 g flour

· 250 g margarine

· 1 egg

· 1 T vinegar


Icing (Cream)

· 1 cup sugar

· ½ L milk

· 2 eggs

· 2 T flour

· 200 g butter

· vanilla


Directions


Make the dough first because it needs some chilling time.


Mix the margarine (or butter) with the flour. Do this a little at a time for consistency. The recipe says to do this “until smooth”.


It never really got “smooth”. Just sort of crumbly., which is what I expected from margarine and flour.


Next the recipe called (in a separate bowl) to mix the egg with vinegar in 1 cup of water.


This is where I think something went funny with the recipe. I trustingly did this:


and then mixed it with the flour mixture, but because I knew the dough would later be rolled, I also knew it looked WAY too runny. The recipe said to knead the dough until “elastic-y”, but I could tell that wasn’t going to happen. In an attempt to remedy the situation I proceeded to knead in flour in small portions until the dough became a little less “wet”. Although, it still wasn’t what I would call “elastic”, but I decided to roll with it. Get it? Haha.


I didn’t want to make the dough TOO thick because it has to be rolled really thin. Oh! And I also added salt. I tasted the dough and it seemed a little floury so I whipped out the salt shaker. I’m not sure how much I put in, but it was only a little. Definitely less than half a teaspoon.


Okay, so I got my dough somewhat elastic. Then you portion it in 8 equal parts. I wrapped these in plasti-wrap and stuck ‘em in the fridge.


Cream filling:

I once tried to make custard and burned it. I was a little worried about this one, but it turned out great!

In a saucepan, mix the sugar eggs and flour.


Then stir in the milk.


Cook the liquid on a low heat and STIR CONSTANTLY OR IT WILL BURN OR BOIL OVER.


This part actually takes a little while. I read somewhere that you must do this for 10 minutes, but I’m sure I was standing there for at least fifteen. When you start, the liquid will be pretty thin. Eventually it will thicken up, but it takes a while, but then happens quite suddenly. Pay attention (I’ve made this mistake). I was reading up on custards and it’s got something to do with the egg that it shouldn’t get too hot or it will set improperly. (HERE are some custard tips if you’re interested. This recipe uses a “stirred” custard)


You can tell when the icing is finished by dipping a metal spoon into it. You should see a film like this:


When this happens, take the saucepan off the heat.


Once it has cooled a little, add ½ tsp of vanilla. Then stir in the butter, a little at a time again.


Voila! Done icing.


Baking time.


Preheat the oven to 365F. The recipe I used didn’t include a baking temp or time, so I ended up figuring this out when 420F was too hot. Yep.


These next steps should be repeated for each section of dough.


First roll the dough out really thin.


I have pizza pans, not baking sheets, so please make due. Then cut the excess strips of dough off (you want at least semi-uniform pieces for when you layer the cake). Don’t through these strips away. Use them. Later.


Pierce the dough with the fork all over.


Put to bake. Depending on how hot your oven is, the baking time will vary. I baked my sheets for about 5.5 to 6 mins each. You want them to stay golden in colour, but still get crispy.


Once all your layers are baked, it’s time for the scraps! Bake the excess strips of dough the same way. You will use them to crumble on the cake afterwards.


Now it’s time for assembly! Put the first sheet down on whatever you’re going to use to transport your cake. Then put the icing generously on top.


Repeat with all the layers. Finish with cream all over the top. It looks nice when it spills over and covers the sides of the cake, see:


Finally, take your strips, crush ‘em, and sprinkle the pieces all over the top.


Ta Da!! Pretty, no?


Finally, put your cake in the fridge for at least 2 hours (the longer the better, trust me).


And, enjoy!


Wednesday, November 25, 2009

Coffee Chocolate Chip Banana Bread (from Baking Bites) + Hate-On for Campus Food Services


Rant: Do you know how much a slice of “X” bread (banana, zuchinni, carrot, cinnamon, poppyseed, etc) costs on campus?!? Yesterday, I didn’t have time to prepare anything to take with me to school (this semester my Mondays include an aquafit class at 6:45am and then classes straight from 11 through 3:30), so I decided to make my breakfast and lunch purchases on campus. Yes, I knew it wasn’t going to be cheap, but in this case I was substituting money for time (I was busy Sunday night, and there is no way I’d be getting up earlier than 5am to make my food for the day). My purchases included: breakfast – milk and bagel with cream cheese (one of the cheaper choices around, about $5 total) and then for lunch I bought a black bean and artichoke salad (which I ended up throwing out because it tasted like someone dropped it in dirt and then scooped it back into the little plastic container – blech!) and a fruit salad (which was soft, but still edible). I figured I wanted more carbs in my lunch so I quickly ran to the food court between classes (I had 10 minutes and this was extremely difficult). I decided to buy a slice of (whatever) bread. I checked the price at 3 places – which was only possible because they were very close to each other. It costs between $2.25 and $2.75 a slice – A SLICE!!!!!! I COULD BUY A WHOLE LOAF FOR THE PRICE OF 2 SLICES AT THE GROCERY STORE!!!! Now I’d understand if it was some fancy sit-down coffee house where you pay for the service, atmosphere, etc., but this is on CAMPUS. What ever happened to affordability for students?? I know it’s only two bucks, but what if you lived in a residence with no kitchen and HAVE to buy food on campus (residence meal plan – it exists, I’m not making this up). That is completely unfair and total gouging of students. I could probably rant for a half hour about how Food Services rips students off and offers choices that are completely un-nutritional, but that will probably serve no purpose other than making me mad.

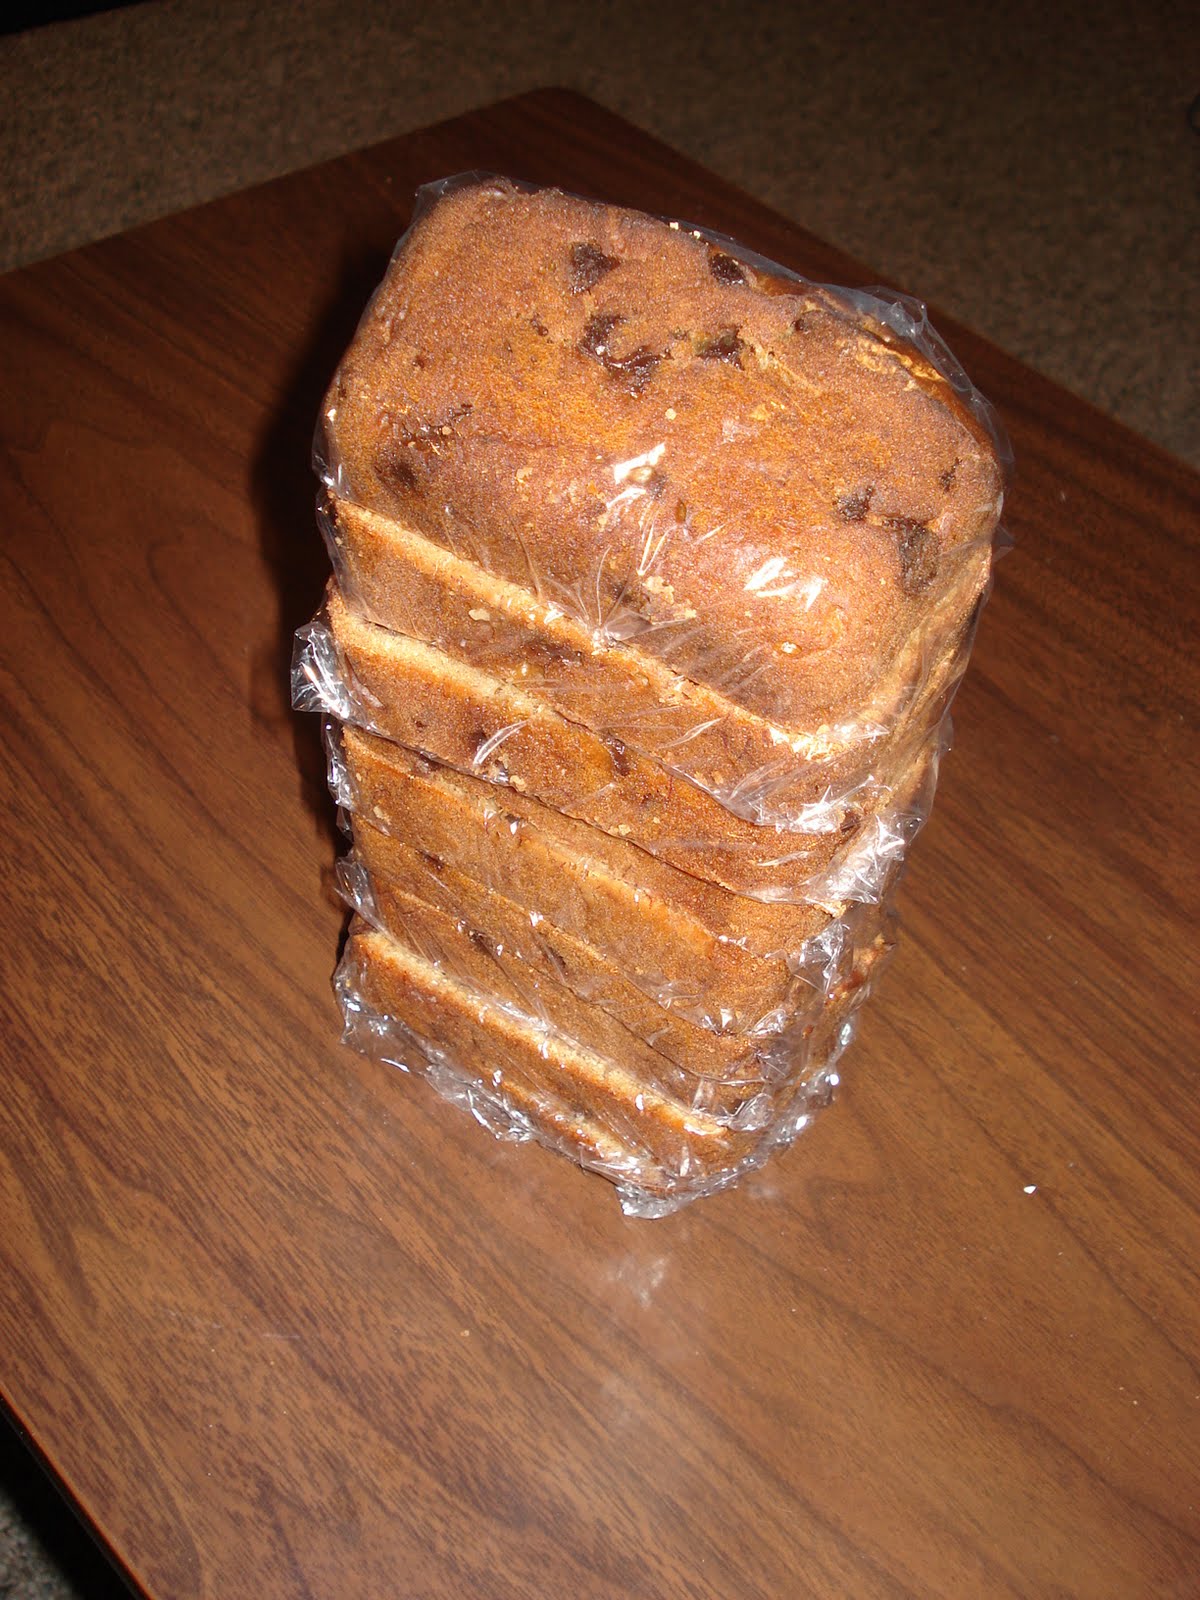
ANYWAY, I bought the stupid “X” loaf because I was hungry (and I’m glad I did despite the price because I ended up having to throw away that salad). So today I decided that the system will take advantage of me no more!! I am going to make my own loaves and freeze individual slices just for days like this! No more being at the mercy of the evil food court gods! End Rant.

Okay so here it is, I stumbled upon a recipe on Baking Bites that really piqued my interest. It uses the new Starbucks Via as an ingredient, and as an attempt for me to kick my (expensive) “Skinny Vanilla” addiction, I’ve developed a new (cheaper) “Via Italian Roast” addiction… so I have lots of the stuff lying around.

You can follow the recipe found here. I'm sorry about the lack of step-by-step pictures, but by the time I remembered that I wanted to blog about this, my loaf was already in the oven. (oops!) Also, I didn't read the post too carefully, but I think it was meant to make 2 mini loaves. I left my (single) loaf in for 50 mins at which point I thought it was done - I even did the toothpick test; but it seems I should've made multiple punctures because the inside on the other side of the loaf didn't turn out as nicely. I also couldn't put it back in because a) it was already cut and I don't know if you're supposed to do that (lol) and b) the outside was starting to get a little darker than my liking, so any more time I think the crust might have burned.

Next time, I think I'm going to bake the loaf for at least an hour at 300 or 325 so the outside doesn't brown as fast.

I haven't tried any yet, but boyfriend says it's good (he might just be being nice, though). I'll let you know what I think when I've had a chance to try some. All the pieces are wrapped and in the freezer now.


P.S. Just FYI, finals are coming and I may not have a chance to post here again for a little while. If I can I will, but otherwise, you may not hear from me until after Dec 15. I'm alive, just stressed. Don't worry.

Thursday, November 12, 2009

Nuclear Cupcakes... a.k.a Mint Chocolate Chip Cupcakes with Dark Chocolate Ganache

Today I went a little bit nuts in the kitchen. It was definitely a day of firsts for me. I don’t know if it’s because I felt guilty for not blogging for the last couple weeks, or if it was due to complete kitchen withdrawal, but I was whipping things up right and left. Well, not exactly whipping. More like slowly trying to figure out and running back and forth between my computer and counter. Haha.

Sorry I haven’t been keeping this up for the last little bit. My life has just had a chance to calm down from the hectic frenzy of college midterms. I don’t know if any of you have taken any business courses, but they leave precious little time for anything else. Have you ever gone into an exam, trying to remember all the little details from studying the days before, but just know you won’t remember it all? – I’m sure some of you can relate. I already know I got one long answer calculation wrong because I forgot the stupid half-year tax rule. Yes, I said it, it’s STUPID. The only reason it’s probably there is so that I can be tested on it and NOT remember to include it in my calculation. Okay, maybe there’s actually a good reason for it, but I’m just bitter now.

Okay, enough of my rant. This week I’m posting these awesome lil’ things:


Mint Chocolate Chip Cupcakes Dipped in Dark Chocolate Ganache, cute huh?

I a-little-bit cheated on these. I had a package of white cake mix left over from a watermelon cake that I made and I figured this would be a fun way to use it up!

What you’ll need:

Cupcakes
One package of white cake mix and whatever it calls for (mine needed to mix with 1 ¼ cup of cold water and 2 egg whites)
Peppermint extract
Green food colouring
Mini chocolate chips (semisweet)
Cupcake papers (I bought cute green ones!)


Ganache
175ml whipping cream
170g 70% dark chocolate

To Do (Cupcakes):
1. Mix the cake mix as per directions on the package.


2. Add peppermint extract to taste (I put in about 1 ¼ tsp – this tastes pretty good!)
3. Add a few drops of green food colouring to make it look minty!

Okay, maybe it doesn't look that minty in the picture, but i swear it is! For some reason my camera doesn't want to pick up green :(

4. Stir in chocolate chips.


I put in about a cup of ‘em. I feel like maybe a half to ¾ of a cup might’ve been good though, with the ganache and all.


5. Line the pan with the cupcake papers and pour the batter in. Don’t fill them more than ¾ of the way up. The lil’ cakes will grow!


(This is me peaking into the oven before the guys are done. I'm a little impatient like that.)

(P.S. Look how GREEN they are! hehe)

And... TA DA!! Naked cupcakes!


This is why I called them nuclear! They look like something from a comic book with those green glowing crevices. hehe

To Do (Ganache):
1. Chop up the chocolate.


Try to avoid touching it, or it will melt on you! Then put the pieces in a mixing bowl – metal ones are the best


2. Heat the cream in a saucepan till it’s hot
3. Slowly pour the hot cream over the chocolate pieces and stir. Incorporate all the cream and keep stirring until the mixture is smooth. I used a whisk to do this.


4. Let the ganache cool for a bit (but make sure it’s still liquid – maybe for like a few minutes)
5. Dip the cupcakes into the ganache and let stand to cool and set


P.S. Check out the insides:


I went a lil' savage on this one :)

These turned out pretty yum. I thought all the chocolate might’ve been too much but they turned out pretty decent. Next time I wouldn’t add as many chocolate chips though (like I mentioned above). The 70% cocoa dark chocolate is pretty rich.

One question though, if any of you turn out to be baking pros – my ganache cooled with a few tiny bubbles in it. The cupcakes still look cute, but does anyone know a way to get rid of ‘em? (I’m a little bit of a perfectionist type) Suggestions anybody?

Saturday, October 17, 2009

Madness and Cookies


So I'm taking an international economics class and this week I'm working on critiquing an article about produce tracking technology. It's actually pretty interesting. Canada and the States are working together on something called the Produce Tracking Initiative (PTI), which essentially is a barcode that lets the government (and consumers) track food to the farm at which it's produced. The big debate about it, though, is that the US is trying to make participation in this program mandatory, at the producers' cost, and it's got some family farm folk up in arms. Reading about this, I never really realized how bad the food standards were in the USA. I guess only like 7000 of the 150000 (less than 5%!!!!)food processing facilities are actually inspected each year, and there have been an increasing number of cases of food poisoning. The most recent scare I heard about was salmonella in peanut butter, but I was even reading about findings of E. Coli in COOKIE DOUGH!!!

Anyway, all the research this week is starting to get to me, and I must be crazy, because after reading about the cookie dough, I started to crave chocolate chip cookies! haha! So that is what my blog this week is going to be about, but don't worry, these cookies are completely homemade and E. Coli-free! (never thought I'd say that sentence before!)

So here goes:

Homemade Chocolate Chip Cookies/The Life and Times of Monsieur Biscuit - because I couldn't do homework anymore, and I'm slightly irrational (I almost drew a face on him. You were spared.)


Ingredients:


2 1/4 cups flour
1 cup brown sugar
1/2 cup sugar
1 cup softened butter
2 tsp vanilla
2 eggs
1 rsp baking soda
1/2 tsp salt
300g semi-sweet chocolate chips


Directions:


1. Preheat oven at 375.
2. Mix butter, eggs, sugars, and vanilla until the mixture is light and fluffy.
3. Incorporate the salt, baking soda, and flour by hand.
4. Once the consistency is dough-like, mix in the chocolate chips.
5. Scoop heaping teaspoonfuls onto ungreased cookie sheets and bake for about 12 mins per batch.


...I'll let you decide what happened to the rest of that little guy... hehe